
Honda CR-V DIY maintenance
Unlocking the Secrets of DIY Maintenance: Your Guide to the Honda CR-V
In a world where convenience often trumps hands-on experience, the joy of maintaining your vehicle can easily be overshadowed by the hustle and bustle of everyday life. Yet, for many Honda CR-V owners, engaging in DIY maintenance is not just a way to cut costs—it’s a rewarding journey that deepens the connection to their car. This widely beloved compact SUV, known for its reliability and versatility, can also be an approachable canvas for those ready to roll up their sleeves and tackle some hands-on car care. Whether you’re a seasoned DIY enthusiast or a curious newcomer eager to learn, this guide will explore essential maintenance tasks, practical tips, and the satisfaction that comes with knowing your CR-V inside and out. Join us as we delve into the world of do-it-yourself maintenance—where your Honda CR-V becomes more than just a vehicle; it transforms into a trusted companion, nurtured by your own hands.
Essential Tools and Supplies for Your Honda CR-V Maintenance Journey
To embark on your DIY maintenance journey for your Honda CR-V, having the right tools and supplies is essential for efficiency and precision. Here’s a comprehensive list of must-have items that will make your tasks easier:
- Socket Set: A quality socket set can tackle various bolts and nuts throughout your vehicle.
- Torque Wrench: Ensures bolts are tightened to specifications, preventing potential damage.
- Oil Filter Wrench: Vital for easily removing and replacing the oil filter.
- Jack and Jack Stands: Essential for safely lifting your CR-V during inspections and repairs.
- Screwdrivers: A variety of flathead and Phillips screwdrivers are crucial for various components.
- Multimeter: Useful for diagnosing electrical issues and ensuring a proper battery check.
Along with tools, top-notch supplies are equally critically important to keep your CR-V in great shape. Stocking up on these items will assist in day-to-day maintenance:
- Motor Oil: Choose the right grade as specified in your owner’s manual for optimal engine performance.
- Air Filter: Regular replacement keeps the engine running efficiently by ensuring proper air intake.
- Brake Fluid: Essential for maintaining braking performance; check levels regularly.
- Coolant: Helps regulate engine temperature; ensure it’s topped up to avoid overheating.
- Wax and Cleaning Supplies: Maintain the exterior and interior aesthetics of your CR-V for longevity.
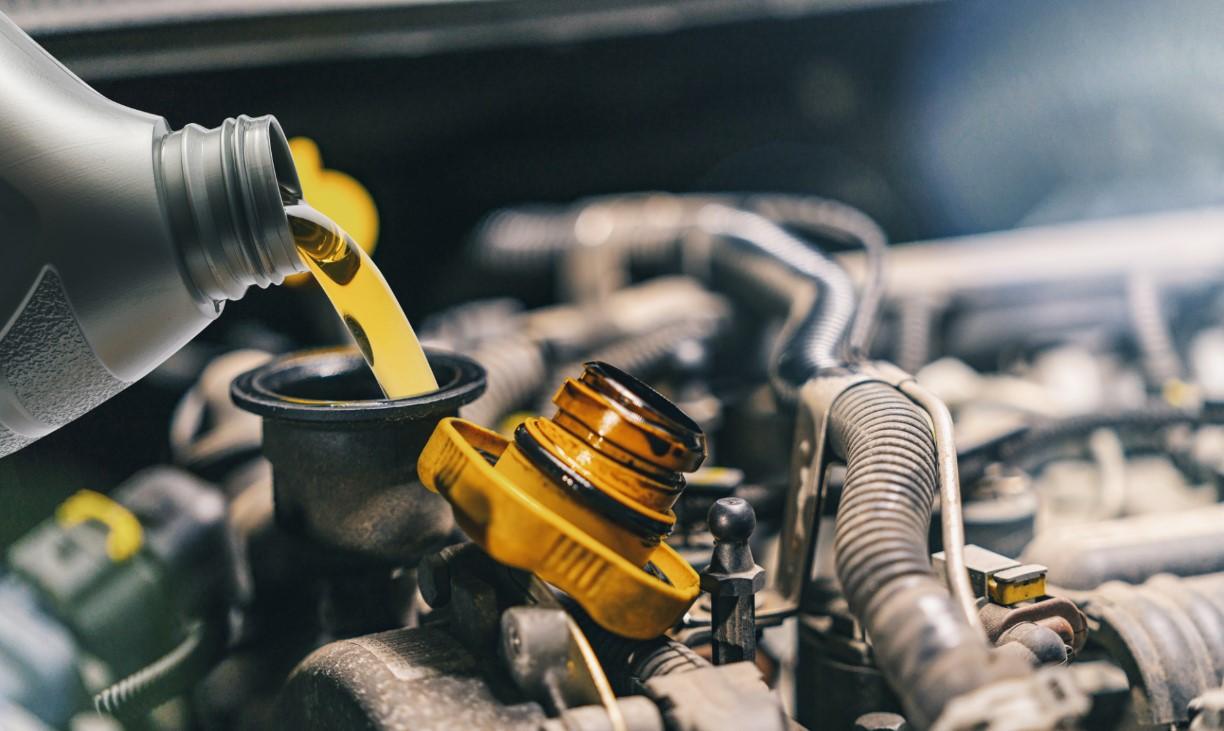
Step-by-Step Guide to Changing Engine Oil and Filters
Changing the engine oil and filters in your Honda CR-V is a practical skill that will save you both time and money. Begin by gathering the necessary tools and materials, which include engine oil, oil filter, a wrench, an oil catch pan, and a funnel. Before you start, ensure the vehicle is on a level surface, and engage the parking brake for safety. Allow the engine to cool down if it has been running. Once you’re ready, lift the car using a jack and place it on jack stands to provide space for access underneath.
Start the process by removing the old oil. Position the oil catch pan beneath the oil pan, then remove the drain plug using your wrench, letting the old oil flow into the pan. once the oil has completely drained, replace the drain plug securely. Next, use the wrench to remove the old oil filter. Apply a bit of new oil to the rubber gasket of the new filter before screwing it in place. pour new engine oil through the funnel into the engine. Check the oil level using the dipstick, and add more if necessary.
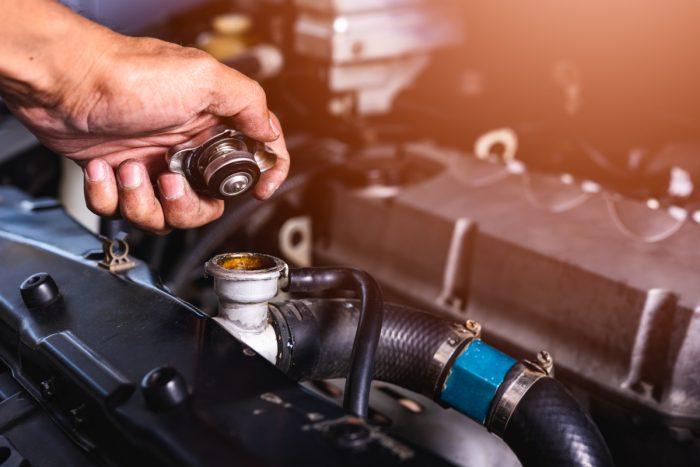
Understanding Fluid Levels: Coolant,brake Fluid,and Transmission Maintenance
One of the essential aspects of maintaining your Honda CR-V is keeping an eye on various fluid levels,ensuring the smooth operation of your vehicle. Monitoring coolant is crucial for preventing overheating, especially during long trips or hot weather. Check the coolant reservoir tank regularly,and learn to identify the difference between the min and max levels. If the level is low, top it off with the manufacturer-recommended coolant mix. Similarly, brake fluid serves as a vital element for safe driving, as it allows for consistent braking performance. Inspect the brake fluid reservoir; if the fluid appears dark or is below the minimum line, it’s time to replenish it with fresh brake fluid to maintain the integrity of your braking system.
Maintenance of the transmission fluid is equally important, as it ensures smooth gear shifts and prolongs the life of your transmission. Start by checking the transmission dipstick for color and level; clean,red fluid indicates good health,while dark fluid may require a change. To keep your transmission operating effectively, consider changing the fluid according to your owner’s manual recommendations—typically every 30,000 to 60,000 miles. Refer to the following table for a fast overview of these fluid maintenance checkpoints:
| Fluid Type | Check Frequency | Replacement Interval |
|---|---|---|
| Coolant | Monthly | Every 60,000 miles |
| Brake Fluid | Monthly | Every 2 years |
| Transmission Fluid | Every 6 months | Every 30,000 to 60,000 miles |

Tire Care and Rotation: Maximizing Performance and longevity
Proper tire care is essential for ensuring that your Honda CR-V performs at its best while also extending the life of your tires. Regularly checking your tire pressure is critical; under-inflated tires can lead to poor fuel economy and reduced handling, while over-inflated tires can cause uneven wear. Make it a habit to inspect your tires for signs of damage or wear, including bulges, cracks, and worn tread patterns. A simple tread depth test can help you gauge the remaining life of your tires:
- Quarter Test: Insert a quarter into the tread; if you can see all of Washington’s head, it’s time for new tires.
- Tread Wear Indicators: Look for the small bars of rubber that appear between the treads; if they are level with the tread, replace your tires.
A well-executed tire rotation schedule will not only enhance safety but also improve your CR-V’s handling and driving experience. The front and rear tires wear differently due to weight distribution and steering forces,so rotating them based on your owner’s manual recommendations can help achieve even wear. Generally, aim for a rotation every 5,000 to 7,500 miles. A simple rotation pattern could look as follows:
| Position | Rotation Direction |
|---|---|
| Front left | Rear Right |
| Front Right | Rear Left |
| Rear Left | Front Right |
| Rear Right | Front Left |
Insights and Conclusions
mastering DIY maintenance for your Honda CR-V not only saves you money but also fosters a deeper connection with your vehicle. by equipping yourself with the right knowledge and tools, you empower yourself to tackle routine tasks with confidence. Whether it’s changing the oil, rotating tires, or checking fluid levels, each maintenance task reinforces your skills and nurtures your independence as a car owner. As you embark on your DIY journey, remember that patience and practice are your best allies. So, roll up your sleeves, dive into the owner’s manual, and enjoy the satisfaction that comes from knowing your CR-V is in top-notch condition—all thanks to your own efforts. happy wrenching!